Epsom Draw Bias Explained: Stall Statistics for Oaks 1m4f
Best Horse Racing Betting Sites – Bet on Horse Racing in 2026
Loading...
Introduction: Why Draw Matters at Epsom
At Epsom, the stall draw can shape outcomes before a single horse has broken stride. Unlike galloping tracks where starting position matters less over longer distances, Epsom’s unique topography amplifies draw effects throughout the entire race. The numbers tell a stark story: fillies drawn in stalls one and two have a strike rate of just five percent in Group 1 races at one mile four furlongs, compared to eight to nine percent for those in middle and higher draws.
This statistical disparity reflects Epsom’s physical reality. The start for the Oaks sits near the top of the course, with runners immediately facing a pronounced left-hand bend. Low-drawn fillies must either drop back to find cover or risk being squeezed towards the inside rail, where the camber works against them. Higher-drawn runners face no such dilemma, able to settle into position while maintaining a racing line that suits the terrain.
Understanding draw bias transforms how punters approach Oaks betting. A filly with strong form but an unfavourable draw may offer value precisely because the market underestimates this disadvantage. Conversely, a well-drawn runner with progressive form deserves more attention than raw odds might suggest. The draw does not determine outcomes, but it tilts the probability calculations that intelligent betting requires.
Professional punters and racing analysts have long recognised Epsom’s draw peculiarities. Commentators frequently discuss stall positions in pre-race analysis, and bookmakers factor draw into their initial pricing. Yet the casual punter often overlooks this dimension, focusing on form and trainer without considering where their selection will break from the stalls. This knowledge gap creates opportunities for those willing to examine the data.
This guide examines Epsom’s draw dynamics in granular detail. We break down strike rates by stall position, explain the track geometry that creates bias, and provide a framework for incorporating draw analysis into your Oaks selections. The data comes from decades of racing at this unique venue, distilled into actionable insights. Numbers behind the corner reveal edges that casual punters overlook.
Understanding Epsom’s Unique Track Layout
Epsom Downs defies conventional track design. Where most British racecourses offer essentially flat, regular surfaces, Epsom presents an undulating challenge that rises, falls and tilts throughout its circumference. The Oaks course of one mile four furlongs incorporates nearly all of these idiosyncrasies, creating a test unlike any other Classic.
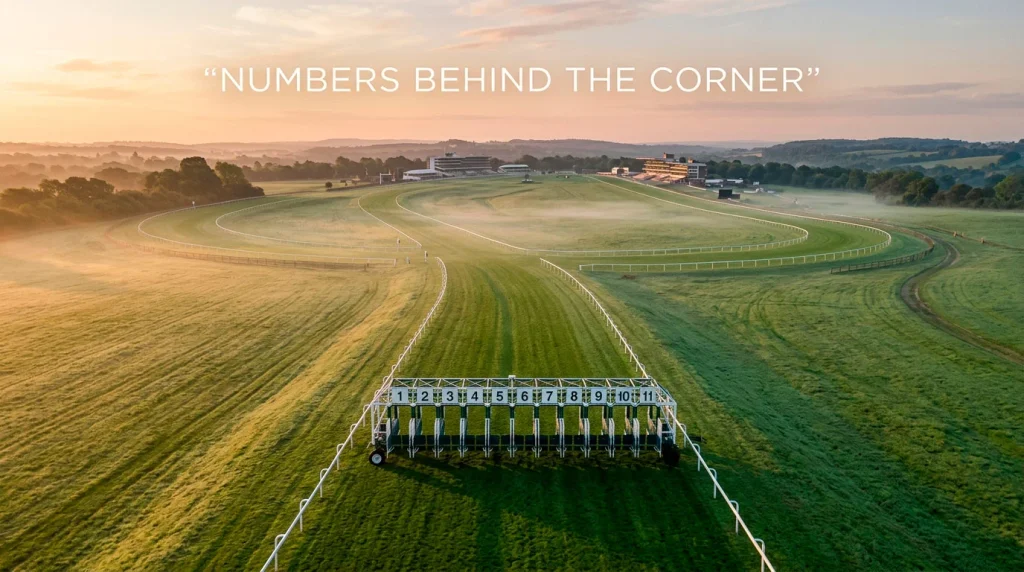
The start takes place near the highest point of the course. Runners break from stalls positioned along a slight curve, immediately facing a left-hand bend that sweeps downhill towards the back straight. This initial bend determines early racing positions, with jockeys seeking to establish their fillies in favourable spots before the terrain becomes more demanding.
The stalls themselves are positioned to account for the bend. Runners on the inside have less ground to cover to the first turn, while those drawn wide must either use early speed to cross or accept a wider position. Neither option is inherently superior, but each creates different tactical scenarios that unfold throughout the race.
From the back straight, the course rises gradually before dropping sharply towards Tattenham Corner. This descent puts horses on their forehand, testing balance and requiring jockeys to manage momentum carefully. Fillies who race too keenly down this section often pay the price in the final furlong, their early exuberance leaving nothing in reserve when the finish demands effort.
Tattenham Corner itself presents the course’s signature challenge. The left-handed bend combines with a pronounced camber that tilts the running surface away from the inside rail. Horses naturally drift towards the outside, following the slope rather than the shortest route. Jockeys must work to keep their mounts balanced, resisting the gravitational pull while maintaining racing position.
The home straight offers no respite. After Tattenham Corner, the track dips slightly before rising towards the winning post. This final incline exposes fillies with insufficient stamina, as even a few yards can feel like a furlong when reserves are depleted. The combination of camber, descent and final climb creates a unique examination that only genuine stayers pass with distinction.
This topography explains why draw matters more at Epsom than elsewhere. Every bend, every gradient interacts with starting position to create cumulative advantages or disadvantages. Low draws place fillies on the inside through Tattenham Corner, where the camber fights against them. Higher draws allow more natural racing lines, reducing the physical demands of navigating the course.
Stall-by-Stall Strike Rates for 1m4f
Statistical analysis of Epsom Group 1 races at twelve furlongs reveals clear patterns in stall performance. The numbers compiled by FlatStats offer punters concrete data rather than vague impressions about draw bias.
The Actual versus Expected ratio provides the clearest measure of draw effect. This metric compares how often horses from each stall position win against how often they should win based on their starting prices. An A/E ratio of 1.0 indicates performance matching market expectations; below 1.0 suggests underperformance, above 1.0 indicates outperformance. For low draws at Epsom, the A/E ratio sits at just 0.58, meaning fillies from stalls one and two win at barely half the rate their odds suggest they should.
This underperformance is not random noise. The sample size across decades of Epsom racing provides statistical significance. Low draws consistently disappoint, year after year, across different ground conditions and varying field compositions. The pattern is robust enough to inform betting strategy with confidence.
Middle stalls fare considerably better. Positions four through eight produce A/E ratios much closer to parity, with some individual stalls exceeding 1.0 over longer sample periods. These draws avoid both the inside rail squeeze and the extra ground covered by extreme outside positions. For Oaks punters, identifying fillies with genuine chances in this stall range offers a statistical edge.
Stall ten has produced ten Derby winners since 1967, a record no other individual position approaches. While Derby data includes colts rather than fillies, the pattern reinforces the advantage of middle-to-high draws at Epsom. Stall ten sits sufficiently wide to avoid inside rail trouble while not requiring excessive ground coverage. For Oaks runners, similar positions offer comparable benefits.
High draws present their own trade-offs. Fillies drawn in double-digit stalls must cover more ground than inside rivals, potentially adding lengths to their journey around Tattenham Corner. However, they enjoy clearer runs and can select racing lines that suit the camber. The net effect depends on field size: in small fields, wide draws matter less; in maximum fields of twelve or more, the extra distance can prove costly.
Seasonal patterns also emerge from the data. Earlier meetings at Epsom sometimes show different draw effects than the Derby Festival, potentially reflecting ground conditions or rail placements. However, the Oaks consistently rewards middle draws, making this the most reliable pattern for punters to follow.
These statistics demand context rather than blind application. A high-class filly from stall two may still win, overcoming draw disadvantage through superior ability. A moderate filly from stall ten remains unlikely to beat genuine stars. The draw provides an adjustment factor, not an override of form analysis.
Tattenham Corner: The Great Equaliser or Eliminator?
Tattenham Corner has ended more Classic hopes than any other point on the British racing calendar. This sweeping left-hander combines multiple challenges into a single examination that exposes weaknesses while rewarding balance, courage and tactical nous.
The corner takes its name from the adjacent Tattenham Corner railway station, built to serve racegoers in the early 20th century. For fillies in the Oaks, it represents the point where races are often lost and occasionally won. Those who handle it smoothly can accelerate into the straight with momentum; those who struggle lose ground that proves irrecoverable.
The camber creates the primary difficulty. The track surface tilts away from the inside rail, meaning fillies racing close to that rail must fight against the natural slope. Their bodies want to drift right, following the camber, but the racing line demands they stay left. This requires constant effort from horse and jockey, effort that depletes energy reserves needed for the final three furlongs.
“There is undoubtedly an ever-growing desire for data among those consuming and betting on racing. As other sports continue to develop ways in which their fans can gain greater insights through use of real-time data, this is clearly an area in which racing can continue to evolve.” — Brant Dunshea, CEO, British Horseracing Authority
The descent into the corner adds further complication. Fillies arrive travelling downhill, putting weight on their front legs and challenging their balance. A slight stumble or loss of footing can disrupt momentum at precisely the wrong moment. The combination of downhill approach and cambered surface sorts out horses who lack the physical attributes for Epsom.
Ground conditions affect how the corner rides. Softer ground tends to accentuate the camber effect, as horses sink into the turf and find it harder to resist the slope. Faster ground allows cleaner passage but can catch out fillies who over-race on the descent. Trainers factor ground expectations into their Epsom calculations, knowing that certain fillies will handle specific conditions better than others.
Jockeys approaching Tattenham Corner face tactical decisions with significant implications. Racing wide avoids the worst of the camber but covers extra ground. Racing tight saves distance but increases the risk of interference and forces engagement with the challenging inside line. The best Epsom jockeys position their mounts for the corner several furlongs beforehand, anticipating the demands and preparing their fillies accordingly.
For punters, Tattenham Corner performance provides a filtering mechanism. Fillies who have previously handled the corner well deserve respect in subsequent Epsom outings. Those attempting Epsom for the first time represent unknowns, their ability to cope untested until the race itself reveals the answer.
How Camber and Gradient Affect Race Pace
The camber and gradient at Epsom work together to create physical demands that distinguish this course from every other British venue. Understanding these forces illuminates why certain running styles and physical types excel at Epsom while others consistently disappoint.
The gradient profile begins with a steady climb from the starting stalls. This initial ascent is relatively gentle, allowing fillies to settle into their early stride without excessive effort. The climb continues for approximately three furlongs before the course levels briefly, providing a respite that experienced jockeys use to allow their mounts to breathe.
The descent towards Tattenham Corner represents the sharpest gradient change. Over approximately two furlongs, the course drops substantially, accelerating fillies towards the corner at speeds that can prove unmanageable for the less balanced. Jockeys must judge pace carefully here, allowing their mounts to use the downhill momentum without racing too freely. Those who let their fillies bowl along unchecked often regret it in the final furlong.
Watching horses negotiate this descent reveals much about their suitability for Epsom. Some fillies lower their heads and fight against the slope, wasting energy in resistance. Others flow with the gradient, maintaining rhythm while allowing the hill to carry them forward. This distinction often separates winners from also-rans at Epsom.
The camber reaches its maximum severity through Tattenham Corner itself. The cross-slope exceeds that found on any comparable British course, tilting runners towards the outside rail with persistent force. This explains why fillies often drift wide through the turn, even when their jockeys aim to save ground by staying inside. Fighting the camber requires significant energy expenditure.
After the corner, the camber reduces but does not disappear entirely. The straight tilts slightly throughout, continuing to influence racing lines until the final furlong. The gradient adds a final complication: a brief dip followed by an uphill finish that demands genuine stamina. Fillies who appear to be travelling strongly at the two-furlong pole can falter in the final hundred yards, the gradient exposing reserves that have been depleted by earlier efforts.
Race pace reflects these physical factors. Oaks fields rarely go particularly fast in the early stages, with jockeys conscious of the demands to come. The descent towards Tattenham Corner typically produces an increase in tempo, sometimes significant. The straight often sees further quickening as fillies with stamina reserves make their moves while those who have raced too keenly begin to empty.
For punters, this pace profile suggests focusing on fillies who settle in the early stages rather than those who pull hard or race prominently. Front-runners can win at Epsom, but they need genuine class to overcome the disadvantage of expending energy before the final test arrives.
Comparing Draw Bias: Derby vs Oaks
The Derby and Oaks share Epsom’s terrain but produce different draw dynamics. Comparing the two races illuminates patterns that punters can apply to Oaks betting specifically.
Derby fields are typically larger than Oaks fields. In 2026, the Derby attracted its biggest field since 2017, while Oaks entries have remained more modest. Larger fields amplify draw effects: more runners mean more congestion, more tactical complexity, and greater importance attached to starting position. When the Oaks draws a full field, these Derby dynamics apply with equal force.
Eight of the last ten Derby winners came from stalls seven or higher. This pattern reflects the advantages of middle-to-high draws at Epsom: cleaner runs through the early stages, natural racing lines through Tattenham Corner, and reduced likelihood of interference. While the sample involves colts rather than fillies, the track geometry that produces these results applies equally to the Oaks.
The fillies’ race does present some differences. Oaks fields tend to settle more quickly than Derby fields, with fillies generally more tractable than colts in the early stages. This reduced early pace may slightly diminish draw effects, as there is less jostling for position when the field is travelling steadily rather than racing keenly.
Weight carried also differs between the races. Derby colts carry nine stone, while Oaks fillies carry nine stone throughout. This parity ensures that stamina demands are equivalent, but the physical differences between colts and fillies may mean the camber affects them differently. Some observers suggest fillies handle the cambered surface more naturally, their typically lighter frames requiring less effort to maintain balance.
Historical analysis reveals that the most successful Derby stalls translate reasonably to Oaks expectations. Middle positions in both races offer the most consistent value proposition. The extreme inside and extreme outside produce more volatile outcomes, sometimes rewarding at long prices but more often disappointing.
Despite these distinctions, the fundamental draw lesson transfers between races. Middle draws offer the most consistent advantage at Epsom, avoiding both inside rail trouble and outside ground loss. Punters studying Derby trends can apply those insights to Oaks selections, adjusting for the typically smaller field sizes and different competitive dynamics.
Applying Draw Data to Your Betting
Translating draw analysis into betting decisions requires integrating statistical patterns with form assessment. The draw provides an adjustment factor, tilting probabilities without overriding other considerations. Here is a practical framework for Oaks punters.
Begin with form analysis. Identify fillies with genuine claims based on trial performance, trainer record, and breeding. Only after establishing a shortlist should draw analysis enter the calculation. A filly with excellent form but an unfavourable draw may represent value; a filly with moderate form in a good draw does not automatically become a bet.
Favourites drawn in extreme positions systematically underperform at Epsom. This finding offers specific value opportunities. When the market leader is drawn in stalls one, two, or on the extreme outside, their starting price may overstate their true winning chance. Laying such favourites, or backing alternatives, exploits a quantifiable market inefficiency.
Consider draw position in each-way calculations. A filly drawn mid-field may place more reliably than one drawn on the inside, even if raw form suggests similar ability. Each-way markets reward consistency, and avoiding draw-related trouble improves placing probability even when winning remains unlikely.
The ante-post market presents draw-free betting. Prices established before the draw cannot incorporate stall information. For punters confident in their form assessments, backing before the draw offers a different risk-reward profile: potentially larger prices in exchange for accepting draw uncertainty. The alternative strategy backs after the draw, accepting shorter prices in exchange for complete information.
Timing your bets around the draw requires understanding market dynamics. Prices typically move significantly once stalls are allocated, with well-drawn fillies shortening and poorly drawn runners drifting. Monitoring these movements reveals market sentiment and can identify late value opportunities when the market overreacts to draw news.
Field size affects draw application. In small Oaks fields of eight or fewer runners, draw bias diminishes as there is more room for all participants to find comfortable positions. In maximum fields, the patterns described above apply with full force. Check declared runners before committing stakes, adjusting draw weighting accordingly.
Finally, combine draw analysis with in-running observation. Watching replays of previous Epsom races reveals how different fillies handled the track. A filly who travelled strongly through Tattenham Corner despite an awkward draw demonstrated adaptability that improves her prospects. One who lost ground and never recovered may lack the balance Epsom demands, regardless of stall position.
Record keeping improves draw analysis over time. Note which stalls produced placed fillies in each running, track how your draw-adjusted selections perform, and refine your weighting system based on observed results. Data-driven punting requires data collection, and the Oaks provides an annual opportunity to test and improve your methodology.
The numbers behind the corner do not guarantee winners. They provide an edge, a marginal advantage that compounds over time when applied consistently. The intelligent Oaks punter weighs form first, considers draw second, and integrates both into a coherent selection process.
Responsible Gambling
Statistical analysis improves betting decisions but does not eliminate risk. Gambling should remain an enjoyable activity, never a source of financial or emotional harm.
Set clear limits before betting on the Oaks. Decide your total stake in advance and do not exceed it regardless of how the race unfolds. Never chase losses with increased bets, and never gamble with money allocated for essential expenses. If gambling feels like a problem, help is available from BeGambleAware and the National Gambling Helpline.